EFFECTS
The Isle I-1 ships with a large collection of onboard effects, and that collection is constantly growing. Effects can be wired into a sound in several places. In each spot, effects can execute in series or in parallel, or both. Many effects can operate on multiple channels of input, and with a huge and growing collection of filters, all kinds of subtractive synthesis techniques are possible.
There are 4 key places where effects can be inserted into the sample generation flow:
- Any Oscillator can have its own effects
- The Patch’s Mixer
- The internal Mixer of Keyboard Splits, Drum Patches, and Vector Synth Patches
- The system-level Effects Send
In each spot, managing the effects chain is basically an identical process – a panel containing a diagram of the entire effects chain of an operator is presented, with the operator (such as the Mixer) at the bottom of the diagram. Effects are processed according to the flow of the diagram – from the operator, upward to each effect wired directly to that operator, and continually upward through each effect wired in series. The sum of the output of each leaf of the diagram goes to the operator’s output, such as audio output for a Patch’s Mixer.

To add an effect to an operator which supports an effects chain, open that operator’s effects diagram view:
- For any Oscillator, open its settings panel, then click the Effects button, on the same row as the Add Modulation buttons
- For a Patch’s Mixer (including Keyboard Splits, Drum Patches, and Vector Synth Patches), click the Effects Send tab in the Patch Edit view
- For the system-wide Effects Send, click the button in the System view at the bottom of the main window
Open the root operator’s settings by clicking on its box in the diagram (if there are no effects present here, you will only see the operator’s box). At the top of the operator’s settings panel, you will see an Add Effects button – click the Add Effect button at the top of the panel, and you are presented with a dialog listing all available effects. The list can be filtered by effect category:
- Delays and delay-based, including the versatile N-Tap Delay, flangers and chorus effects
- Filters, including all variations of Bi-Quad and RBJ filters
- Modulation – all effects based on oscillator modulation, including Phaser
- Reverbs
Double-click an effect in the list or select and click OK, and you are returned to the effects diagram view, with a new effect added to the operator. You can continue to add parallel effects by adding more to the operator. To remove an effect, click the trash can icon in the corner of the effect’s box (any effects downstream, in series, will also be removed from the patch). To add an effect in series, basically add an effect to an effect. Each effect can have its own parallel and series effects.
Each object which supports an effects chain, including effects themselves, contains an array of settings panels for each effect wired to it. The settings contain the following sliders to control how the effect is applied:
- Level controls the level of the effect’s output, ranging from 0 to 2.0
- Wet/Dry Ratio controls the ratio of effect output to original signal and ranges from 0.0, a totally “dry” signal, to 1.0, totally the effect output.
- Mix Weight applies to effects executing in parallel – the sum of all mix weight values is taken, and each parallel effect is applied by ratio of its Mix Weight value to the sum of all Mix Weights. For example, if you have three effects in parallel, and each effect has a Mix Weight of 1.0, each parallel effect will contribute 1/3 of the total Effects Send signal. If the first effect had a Mix Weight of 5.0, while the other two effects remained at 1.0, the first effect would contribute 5/7 of the total Effects Send signal, while each of the other two effects would contribute 1/7.
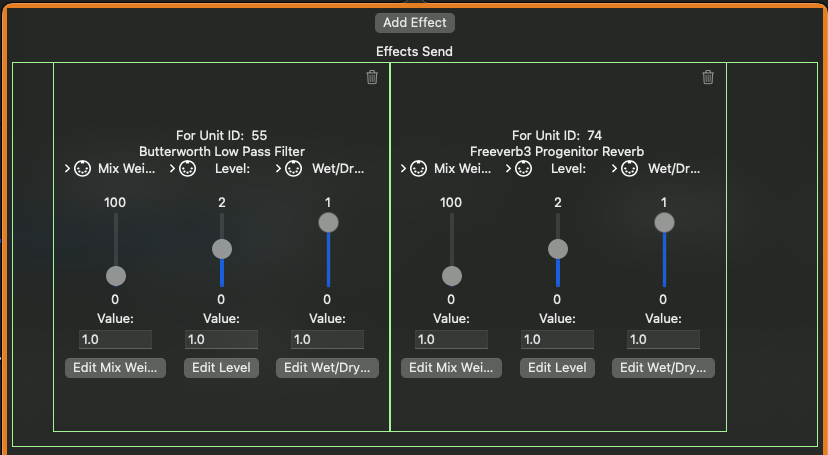
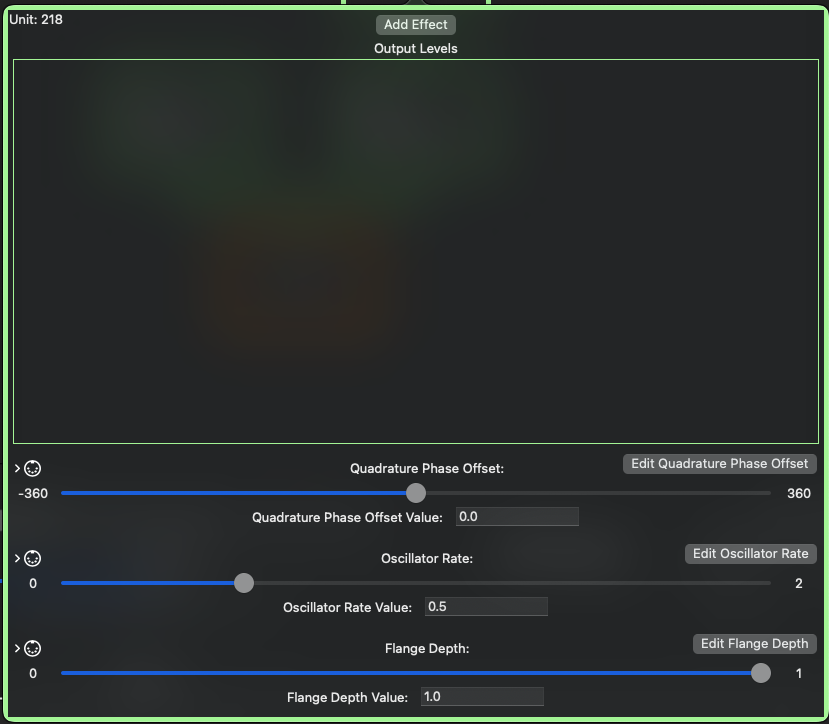
Controls for each effect’s editable parameters are available on the effects settings panel. Almost every parameter can be modified in real-time by manipulating controls such as sliders, and each are fully MIDI-controllable.
SUBTRACTIVE SYNTHESIS
The Isle I-1 offers a wide collection of filters available as onboard effects, which can be plugged into any effects chain, including those of individual oscillators. Filters remove frequencies above a cutoff frequency (low-pass), or below (high-pass), or allow (band pass) or block (band-stop) a range of frequencies in the audible spectrum. How completely frequencies are filtered, relative to the cutoff frequency, depends on the filter’s slope. Certain filters can also boost frequencies around a resonant peak. Using filters, you can achieve what is commonly known as Subtractive Synthesis – creating and changing timbres by applying filters and modulating, or otherwise modifying, their cutoff frequencies.
The Wikipedia article on Subtractive Synthesis (https://en.wikipedia.org/wiki/Subtractive_synthesis) contains a step-by-step walkthrough of producing a “plucked string” sound via subtractive synthesis. Here’s how to implement that example in the Isle I-1.
The example starts with two waveforms. Both appear to have been generated by some hardware with slight amount of noise on the line, but the first is basically a square wave with a 2:1 duty cycle. Let’s start in the I-1 with a new patch, then change the wave generator in the first oscillator to Square, and set its duty cycle to 0.667:


The second waveform is the sum of square and sawtooth waves. The duty cycle for this square wave is about 1:1, but there also appears to be some phase offset between the sawtooth and square waves. Let’s add two more oscillators to the Mixer, set the wave generator on the first to Sawtooth, and the second to Square. I’m also getting a closer match to the timbre of the Wikipedia example by inverting the sawtooth wave, so that instead of rising from start to finish, it falls. Finally, set the phase offset of the square wave to 45 degrees.


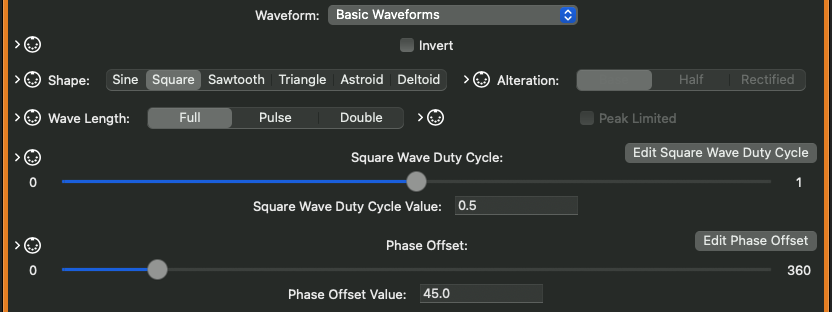
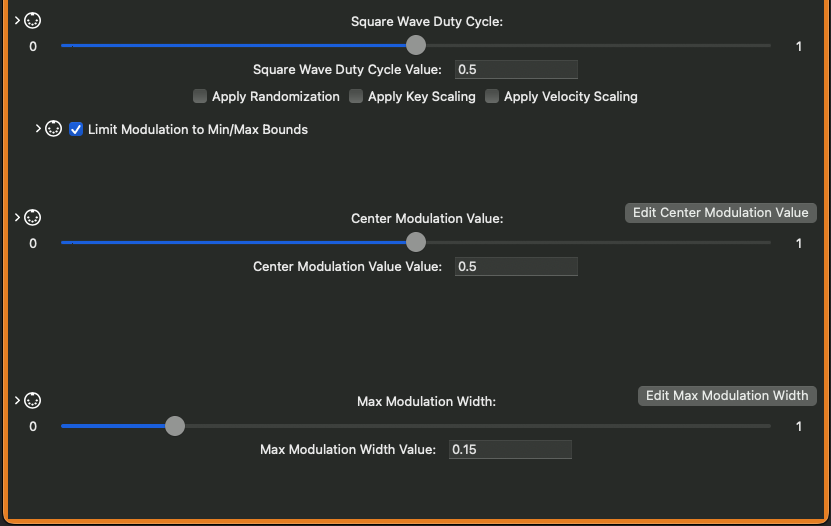
Now to apply Pulse Width Modulation. The simplest way to accomplish that in the Isle I-1 is to directly modulate the wave’s duty cycle parameter. For the first wave, the square wave with the 2:1 duty cycle, click the Edit Square Wave Duty Cycle button, then add an oscillator, and leave its wave generator set to Sine. Adjusting by ear, I can match the timbre by setting the oscillator’s frequency to 8 Hz, then clicking the Duty Cycle box, setting Max Modulation Width to 0.15.
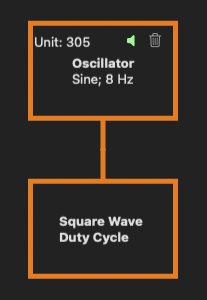
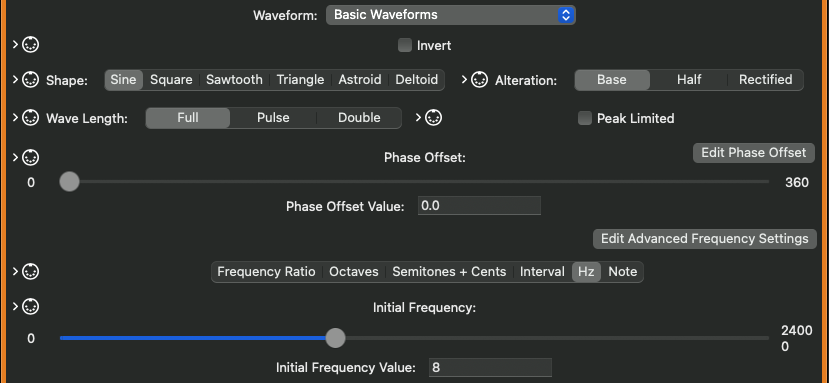
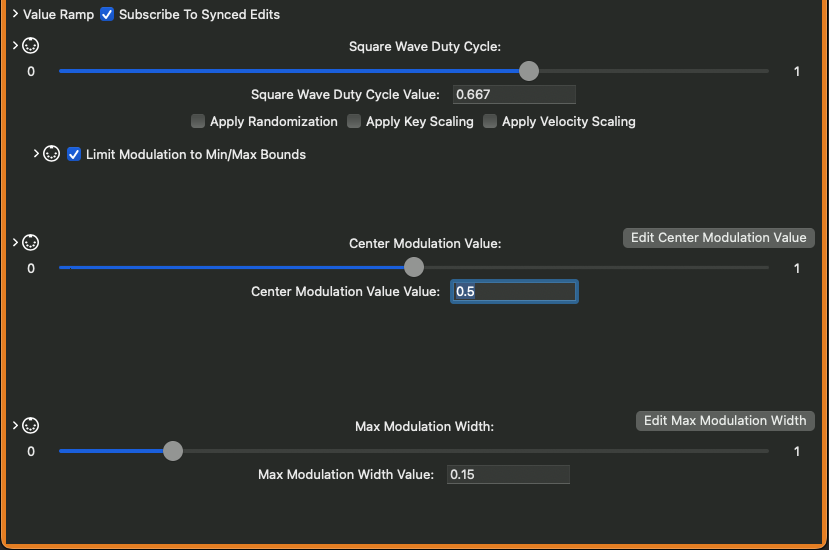
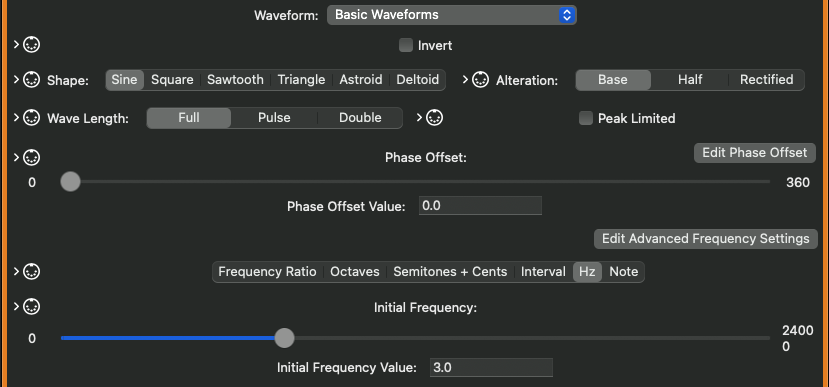
For the second waveform, which is the sum of the sawtooth and 2nd square wave, the modulation can be accomplished entirely through modulating the square wave’s duty cycle parameter – nothing needs to be added to the sawtooth wave. Click the Edit Duty Cycle button, add an oscillator (and leave the waveform as Sine), but set the frequency to 3 Hz (it is slower). Max Modulation Width here is also set to 0.15.
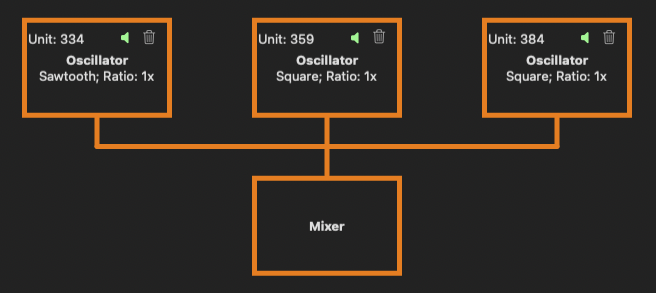
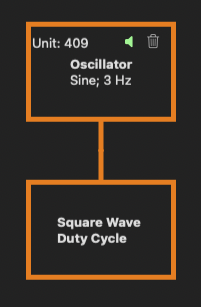
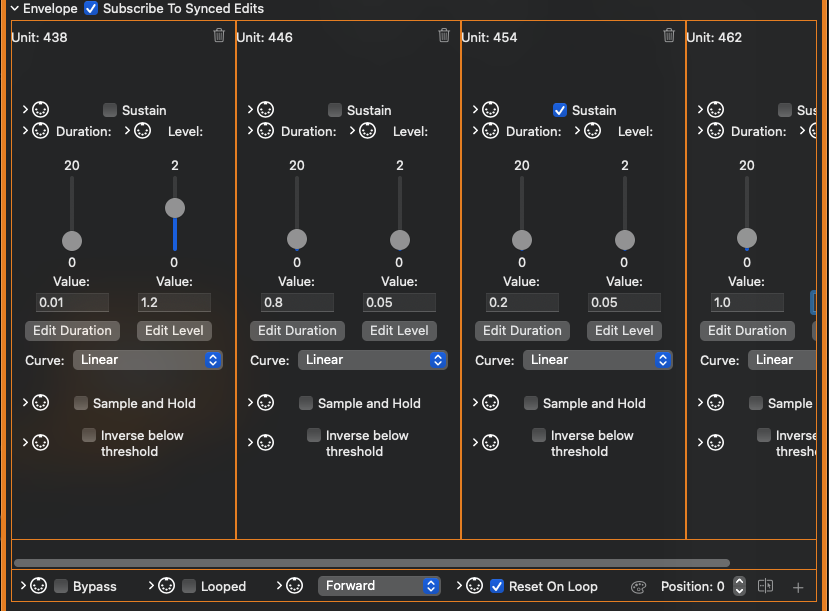
Setting up the envelope, the article describes a 4-stage, Attaack-Decay-Sustain-Release envelope to shape the entire sound, which in the Isle I-1 can be built on the Patch’s Mixer. Looking at the article’s wave form in a wave editor, you can see that the attack is quite short, taking only 0.01 seconds to reach peak amplitude. The decay stage happens a bit more slowly – it takes about 0.8 seconds to settle at an amplitude of 0.05, where it holds for a bit, presumably while a key is held. The curve of the decay stage, basically the shape of how the wave applies changes to amplitude from sample to sample, looks (and sounds) like an exponential curve, with a power of 2 – you can set the attack, decay, and release stages’ curve type to Squared. The held part can be implemented as a Sustain stage – check the third stage’s Sustain checkbox, and since this stage does not change amplitude while the key is held, keep the level at 0.05, and set the curve to Noop (no operation, which does not alter the amplitude). Finally, the release stage fades the sound to 0 over the course of about 1 second.
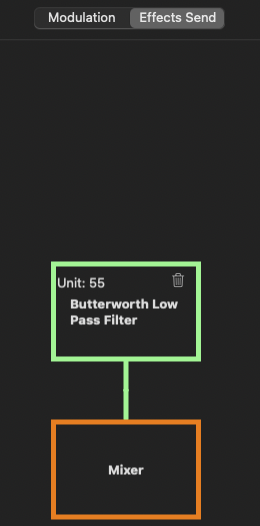
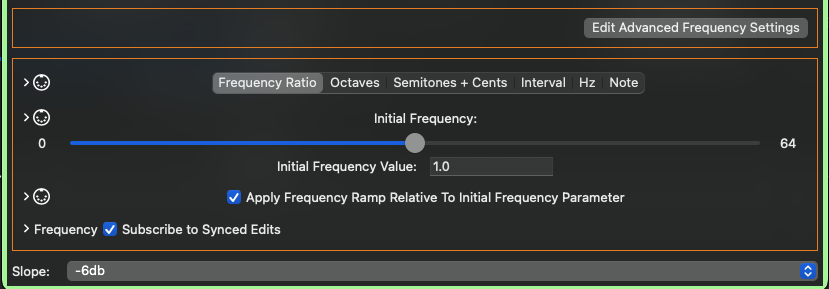
We now have a wave form which is pretty rich in overtones, although it’s too bright to sound like a plucked string. We can dull the sound a bit by filtering out, or subtracting, higher frequencies. Click the Effects Send tab at the top of the Patch Edit view, and you will see the Mixer, with no effects added. Change that by adding a Butterworth Low Pass Filter. The example retains a somewhat bright sound – keep the cutoff frequency set to a frequency ratio of 1.0 (the cutoff frequency will be the same as the note played), and set the Slope parameter to -6 dB, to roll off the higher frequencies a little more gradually and keep some brightness without overpowering.
Next — Isle I-1 User Guide — Chapter 6 — Keyboard Splits, Drum Patches, and Vector Synthesis
Previous — Isle I-1 User Guide — Chapter 4 — Envelopes

